Roblox Studio is giving creators more ways to refine 3D assets without rebuilding them from scratch. The September 2026 update introduced improved texture-generation controls, mesh segmentation for imported models, and image previews for generated meshes and procedural models. Together, the tools target three different problems: changing an asset’s surface, separating a model into editable pieces, and choosing a visual direction before committing to a generated model.
Quick answer: Texture generation can restyle existing meshes; Segment Any Mesh can split an imported mesh into named parts; and image previews let creators compare possible looks for generated assets. These tools can speed up prototyping, but they do not replace careful modeling, UV/topology checks, testing, or human art direction.
What changed in the Roblox Studio update?
Roblox announced three related creator-workflow improvements in September 2026:
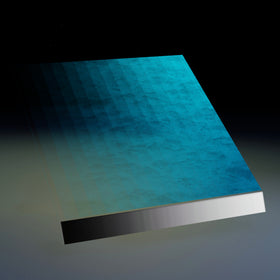
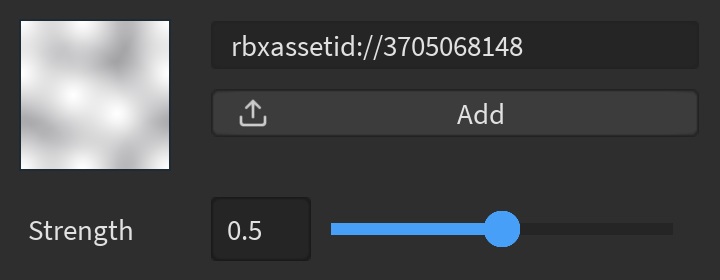
- Improved texture generation: creators can generate a new surface treatment for one or more selected meshes, including existing assets, and refine the result before applying it.
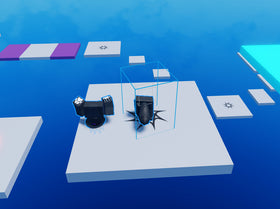
- Segment Any Mesh: imported models can be separated into named components so that individual pieces can receive different materials, scripts, or replacements.
- Image previews: creators using mesh and procedural-model generation can review visual options and use a reference image to guide the result.
The distinction matters. Texture generation changes how a model looks; segmentation changes how its geometry is organized for editing; image previews help decide what a generated asset should look like before it is added to a project. They solve related but different production problems.
Roblox’s announcement is available in the official Creator Forum update.
Texture generation: restyle an existing mesh
The improved workflow is useful when a model’s shape is already right but its material or visual style is not. Instead of rebuilding the object, a creator can select a mesh—or a coherent model made from multiple meshes—and describe the intended surface. The prompt can specify material, color, pattern, wear, and style. A reference image can also help communicate the desired look.
Roblox’s Texture Generator documentation describes two output modes: Fast mode creates a 1K diffuse texture for quick iteration, while Quality mode creates a 4K physically based rendering (PBR) texture for more detailed results. The higher-detail option takes longer, so the practical choice depends on the asset’s importance, viewing distance, and performance budget.

How to get a better texture result
- Select the mesh or a sensible group of MeshParts that form one unified object.
- Open the Texture Generator from the Studio tools, or use the texture-generation entry point available in your Studio build.
- Describe the material and appearance in specific terms—for example, “worn dark-brown leather with subtle creases and brass accents.”
- Review the previews and refine the prompt instead of accepting the first result automatically.
- Choose the generation quality that fits the asset, apply the texture, and inspect it from several angles in the actual experience.
Roblox’s documentation notes that the Texture Generator is best suited to asset-specific textures. For repeating surfaces such as floors or pathways, a tiling material workflow may be more appropriate. Avoid selecting unrelated meshes scattered around a scene: the generator works best when the selected parts form a coherent object.
Important: the Creator Hub documentation still labels the Texture Generator as a beta feature in its documented workflow. Studio menus and availability can differ by release channel, so check the current Studio build and Beta Features panel if the tool is not visible.
Segment Any Mesh: split imported models into useful parts
Segmentation addresses a common issue with imported 3D assets: a model may arrive as one mesh even though it represents several functional pieces. A car, for example, is easier to customize when its body and wheels can be treated separately. The same idea applies to a robot, weapon, prop, vehicle, or other multi-part object.

For an imported mesh, select the MeshPart itself, open Assistant, and enter /segment_mesh. The September announcement describes naming up to five parts in a segmentation run. If you need additional divisions, run the command again on a resulting part. Use clear, physical names such as “body,” “left wheel,” “right wheel,” or “handle” rather than vague labels.


What segmentation can—and cannot—do
Roblox staff explained in the announcement discussion that the Assistant uses the part names to identify the intended regions, while an algorithm performs the actual cuts. The staff explanation says the process is designed to preserve the mesh and UVs, but it is not magic: results depend on how the source mesh is built. Overlapping triangles or unclear boundaries between parts can lead to imperfect splits.
That makes source quality important. Before segmentation, inspect the mesh for overlapping geometry, disconnected islands, thin details, and unclear boundaries. After segmentation, check seams, normals, UVs, pivots, and whether each new part behaves correctly when moved or scripted.
Image previews for generated meshes and procedural models
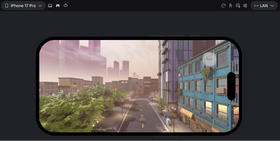
The update also gives creators more control over the appearance of generated assets. In the Assistant workflow, creators can use /generate_mesh or /generate_procedural_model, provide a text prompt, and review image options before choosing a direction. A reference image can be supplied as a visual hint in supported workflows.
Previews are a decision aid, not a guarantee that the final model will match every pixel. Treat them as a way to compare composition, silhouette, and style. Once an asset is generated, inspect the actual geometry, proportions, materials, and in-game readability before publishing it.
Which tool should you use?
| Creator task | Best-fit tool | Why |
|---|---|---|
| Change the look of an existing prop | Texture Generator | Restyles the surface without rebuilding the shape. |
| Make a car’s wheels editable separately | Segment Any Mesh | Separates named components for material or behavior changes. |
| Choose the look of a newly generated asset | Image previews | Lets you compare visual directions before committing. |
| Create a repeating floor or wall surface | Material Generator / tiling material workflow | Repeating surfaces generally need a tile-friendly material. |
Practical workflow for Roblox creators
- Start with the asset’s job. Decide whether you need a surface change, separate moving parts, or a new model.
- Keep a source copy. Duplicate or back up the original asset before applying generated textures or segmentation.
- Use descriptive prompts and part names. Specific material language and meaningful component names give the tools better direction.
- Review the output manually. Check texture stretching, seams, UV layout, geometry, pivots, and visual consistency.
- Test in context. A texture that looks good close up may be too busy at gameplay distance; a segmented part may need collision or script adjustments.
- Keep a human art pass. Use generated results as a starting point, then make deliberate edits so the experience has a consistent visual identity.
Frequently asked questions
Can Roblox Studio generate a texture for an existing model?
Yes. Roblox’s September 2026 announcement describes restyling one or multiple selected meshes, and the Texture Generator documentation explains how to generate and apply a texture to a selected mesh or coherent model group.
What is the difference between Fast and Quality texture generation?
Roblox documentation describes Fast mode as a 1K diffuse texture for quicker iteration and Quality mode as a 4K PBR texture for higher detail. Choose based on the asset’s importance and how closely players will see it.
How do I use Segment Any Mesh?
Select the imported MeshPart, open Studio Assistant, enter /segment_mesh, name the parts you want, and confirm the operation. The September announcement describes up to five named parts per run; repeat the command on a resulting part if you need more divisions.
Does mesh segmentation preserve UVs?
Roblox staff said the segmentation algorithm is designed to keep the mesh and UVs intact. Results still depend on the original topology and how clearly the parts can be separated, so inspect the output before using it in a live experience.
Are the new tools a replacement for 3D modeling?
No. They can shorten repetitive steps and help creators iterate, but they do not remove the need for good source geometry, UV checks, performance testing, art direction, and manual cleanup.
Why can’t I see the Texture Generator in Studio?
Availability and menu placement can vary by Studio version and release channel. Roblox’s documentation currently describes a beta-feature access path, so check File → Beta Features and update Studio if needed.
Official sources
- Roblox Creator Forum: Introducing New Texture Generation Tools, Segment Any Mesh, and Image Previews
- Roblox Creator Hub: Texture Generator
- Roblox Creator Hub: Assistant for Studio
By Shivam Das